Saturday, November 29, 2014

Trail Magic!

My brother believes in magic.  Not the pull a rabbit out of a hat kind of magic or the saw someone in half kind of magic, but something far far more powerful than that.  He believes in something called Trail Magic.

Now if you are a long distance hiker you probably already know what this is, but if you are like me, and the longest hike you do is a trip from the living room to the kitchen, let me explain.  Trail magic is simply when people who are not hiking provide help or support to those that are.  Maybe its a cooler full of drinks on a hot day, or free rides into town for more supplies.  Maybe its a hot meal on a cold day or any number of things that makes the long distance trek a little easier.

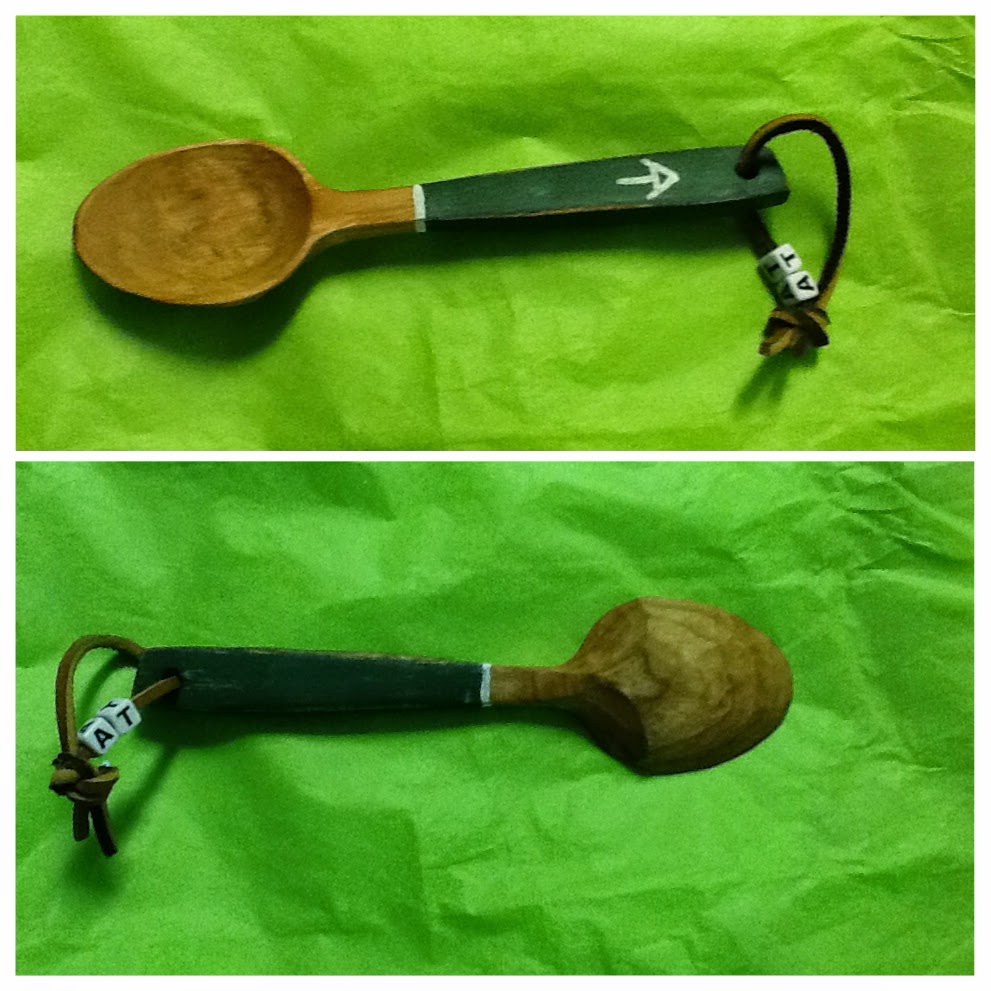
A few years ago, my brother and I started carving spoons and somewhere along the way he started carving a few and putting them in trees along the Appalachian Trail.  Wait..he put spoons in trees along the Appalachian Trail?  Yep!  Maybe you found one?  Lately they look like this, but more often than not they are the same color as the trees they were carved from.

Last year he carved 50 spoons that he left along the trail.  Some found new homes, and some made it only as far as the next campfire.  No matter what happened to them, I can promise you that everyone who plucked one of these spoons from a tree felt the tingle of a little bit of trail magic.


The weather has started to turn cold, we've already gotten our first snow of the season, and temperatures have dipped down into the teens a few times.  The Barefoot Carver hasn't slowed down though, most nights when he isn't at work, you can find him out back in his shed.  Listening to some Jimmy Buffet and carving spoons by the stove.


Don't feel like waiting until spring and hoping to find one along the trail?  Go check out his Etsy page and see what he has for sale.  You can also contact him from his website linked above in this post.  The magic is the same no matter if you find one of his spoons hanging in a tree along the Appalachian Trail or you order one directly from him.  They are all hand made, one at a time, from locally sourced wood.  He'll never make enough to make him rich, but each one will certainly enrich your life just a little bit.

I've got a few projects in the works that will make it to this page soon enough.  Until then, make something with your hands, I promise you it will change your life.  Until next time, Peace, Love and Trail Magic.


Wednesday, September 3, 2014

WSM Smoked Pork Butt

I know this isn't wood working, or even bushcraft, or even something that I threw together in the garage one night, but my last post is tied directly to this one, so here we go.

Barbecue is one of those things that I never get tired of eating.  Ribs, pulled pork, chicken, beef, you name it, if it is cooked over charcoals I love it.  There is something special about cooking on a grill, food just seems to taste better, at least to me.  I've been wanting to get a smoker for quite a while.  My gas grill needed to be replaced anyway, so instead of getting another grill, I decided on the Weber Smokey Mountain.  I got the 22.5 inch model, I figured you can cook small things on a big grill, but it doesn't work the other way around.

My first cook on the WSM was three racks of spare ribs, and while they came out pretty good, it wasn't the best thing to start with.  A brand new WSM runs a bit hot, and I think ribs are much more unforgiving when it comes to temperature changes and such.  I need more practice just using it, so we will revisit ribs another day.  Technically this was my second cook on my WSM, but I tried to focus on the details and make sure it came out right.

I loaded the charcoal ring with a full load of Kingsford charcoal to get this party started.  I had a few pieces of dried Oak laying around that I cut into small pieces and split in half.  I spaced them evenly on top of the coals.

On top of these unlit coals I added half a chimney full of white hot coals and assembled the smoker.  It should be noted that I filled the water pan with water, despite learning that you don't have to use water, I thought that for the first few cooks I would use it.

Yes, I know that gas grill is dirty.  Yes, I know it is REALLY dirty.  I'm a bad grill owner, sue me.

I put the lid on the smoker, opened the top vent all the way open, made sure the bottom vents were open as well and let it come up to temperature.  I closed the bottom vents almost all the way when it hit 225 on the dome thermometer, and it stabilized at about 250 pretty soon after.  With nothing else to do, I took a deep breath and put the two seven pound butts on the smoker, closed the lid, said a prayer to the temperature gods and closed it up for 6 hours.

I got boneless butts, I just didn't read the package well enough.   I tied these with a few loops of natural fiber string.  When the butcher takes the bone out of the butt he leaves a large flap of meat in its place.  You have to tie these back together so you get equal cooking across the whole butt.  Next time I will find bone in butts for sure.  I had opened the butts the night before, seasoned them with a mixture of salt, black pepper, and garlic powder and left them in the fridge over night.  I made some home made dry rub, heavy on the brown sugar, with no extra salt added. I used black pepper, brown sugar, raw sugar, paprika, cayenne pepper, and some chili powder in my rub.

When I checked the butts after 6 hours of cooking, with me only making small adjustments on the vents to move the temperature around a bit, I took them off after making sure that I had hit an internal temp of 165.  I brought them in the house and wrapped them with aluminum foil.

I sprayed them with apple juice and wrapped them tight.  They went back on the grill and cooked for another 3 hours before I opened the grill again.  My plan was to check the temperature and then have them cook another hour or so.  When I checked it though, they were both sitting at the 200 degree mark and I knew they were done.  I pulled them off the grill, vented the foil just a bit to allow them to cool some, then re-wrapped them and let them sit for 2 hours.

I pulled them and just mixed a little of the rendered juices back in and finally after a 9 hour cook plus 1 hour of prep and 2 hours of rest, I had more pulled pork that I knew what to do with.  

I made some home made cole slaw and baked beans as side dishes, and everyone just loved it.  Even my daughter who is notoriously picky when it comes to food.  My neighbors liked it as well.  I was pretty proud of myself and look forward to my next cook.  I'm thinking of making some smoked macaroni and cheese, and maybe some pulled beef.  I can't wait.  Go make some food!  Remember, the most important ingredient is always love, add plenty of that and you can't go wrong.

Tuesday, September 2, 2014

Just a Spoon

I've been noticing a trend lately in the spoon carving world.  I think its a natural thing but the complexity and amount of decoration is rapidly getting out of control.  On one hand I think its a good thing, it shows that the craft is progressing and that people are stepping away from just making spoons and moving into the world of spoons as art.  Allowing people to express themselves creatively through their craft is a great thing.  On the other hand though, I think that this movement toward decorative spoons can be intimidating for the new spoon carver.  I mean how are they supposed to even come close to the chip carving and kolrosing techniques of the master spoon carvers?

Getting into the game of trying to see who can make a better spoon doesn't interest me.  I carve spoons to use, to cook with, to stir a pot of food that I made for my family to eat.  I have a spoon on my desk, in a jar, that Barn Carder made for me a while ago, and to be honest, I can't bring myself to use it.  Now, if you ask Barn, he would probably say to get it out and use it right away.  Because that is what a spoon is, its a tool, a utensil, it is made to be used.  I think though, that if I had one of those highly decorated spoons I wouldn't want to use it either, and frankly that's a shame.

I haven't carved a spoon in a while, I mean a long while.  I can't even tell you why, there are a bunch of reasons I think, but at the end of the day, its because I let life get in the way.  I found my way back, and although I may not be carving a spoon a day or anything, I've picked up my knives, sharpened them, and am carving again.


My latest spoon shows what happens when you don't carve for a while, techniques and tricks that you had learned sort of go by the wayside.  It has some shape issues, some handle issues (like always) and its not the prettiest thing to look at, but it will stir a pot just fine!


Its been a busy few days around the house here, we are getting some painting done, both inside and out.  My clean garage is filled again, and I need to get out there and get it straightened up.  It is what it is, life goes on, go make something with you hands, you'll feel better!

Tuesday, July 15, 2014

DIY Cornhole Boards

It's been a while since I posted here.  I was lost for a while, my brain consumed by a single thing.  Something that didn't involve wood working, carving, or even creating really.  Just the glow of a computer screen in the dark.  I'm back though, and better for it.  

Thomas Huxley penned the following quote:

Its how I want to live my life.  I want to keep learning about things.  If you let your brain become so focused on a single thing, something that ultimately requires no thought, your creativity begins to get choked out, it fades away and all that you are left with is nothing.  Enough about that though, we aren't here for philosophical discussions regarding creativity, we are here to embrace our inner (or exterior in my case) redneck and make cool stuff!

Have you heard of cornhole?  Its a bag toss game where you throw 1 pound corn filled bags 27 feeet onto a board with a 6 inch hole cut in it.  The object of the game is to score 21 points before your opponent does.  It's like horseshoes without the swirling metal U-shaped rings of death.

In any case, I walked into the kitchen the other day and my wife asked me if I could make a set.  I said, without thinking I might add, that I could, and was off to my local Home Improvement store for supplies!  Well, wait, lets back up, I was off to YouTube for a few tutorials.  Then, armed with a list of supplies, headed out.

A cornhole board is simply a 2x4 box with a 1/2 inch piece of plywood attached to one side.  9 inches down from the top edge is a 6 inch diameter hole.  There are two legs attached to one end of the board that raise the back edge of the board 12 inches above the ground.  That's it.  It's pretty easy to build.


I used oak furniture grade plywood for the top.  I could have gone cheaper for sure, but at the same time, I saved time on sanding.  I used wood screws to attach the deck, and I think for my next attempt I will try to use pocket hole screws.  I counter sunk the screws, filled the holes with wood putty, and then sanded the entire top surface.  In any case, putting the boards together was pretty easy, from start to finish it took maybe 45 minutes.  Once finished and sanded, both boards got two coats of primer.  I sanded between coats and sanded the final coat until each board was nice and smooth.  I also painted the sides at this point as well.


At this point, you have to figure out a design.  It's truly up to you.  Do whatever you want.  I decided to use Red, White, and Blue for my boards, but you could truly make any kind of design that you want.  I painted the entire board with two coats of water based white paint and when it was dry, used painter's tape to put in my design.


 Painting takes a long time.  It isn't hard, its just time consuming.  I had to paint three coats of each color, letting each coat dry for about 2 hours before painting again.  I used a smooth finish roller to put on the paint, it worked pretty good, but I still sanded both boards when I was finished painting.  I pulled the tape off after letting the final coat dry for about 2 hours.  It worked well, there is a little bleed through near the top of the board, but all in all I am pretty happy with the results.


At this point I put 5 coats of polyurethane on the boards, sanding lightly (very lightly) with 400 grit sand paper before the last coat.  They are done now, sitting in the garage until tomorrow night when we are going to play on them.  The hole project took about 5 days, but the majority of that time was waiting for paint to dry.  A single set of boards is probably 8 hours of work spread out over 4 or 5 days.  During that time you could just as easily make three or four sets of boards, maybe more, if they had very simple designs.

I missed posting here, not because I have some huge fan base or because I think that I am some amazing writer, but posting here means I made something.  It means I learned something.  See you on the cornhole fields, happy tossing.